Introduction Statement

Hello designers,

my name is Katie Rohrbach of Katie Rohrbach Interiors. Ever since I was about seven years old I have been designing interior and exterior spaces. I still hold onto some of the interior space drawings from way back then. My passion for design continued to grow as time passed by. After graduating high school I attended Bellevue College studying photography, art and design for about two years until I transferred to Washington State University to study interior design. Currently I am enrolled at Washington State University as a freshman in the summer program. This opportunity to study at Washington State University means everything to me and I will tell you why. When I was sixteen years old I had a grand mal seizure at one of my friends birthday parties and landed onto a glass/hardwood coffee table. Ever since that fall I have never quite been the same… the fall caused memory loss to come and go with each passing day since the accident. Four years later and I still struggle with remembering how to do certain activities or what I am supposed to do. The one thing that this accident can’t take away from me is my ability to design and create. Although I will have this ‘handicap’ the rest of my life I will always be able to do what I love; design and create. The world around me inspires my designs and I put everything I have into a project no matter how small. I will continue to expand on my understanding and elements in the Interior Design industry on my road to my future career as an Interior designer.

Saturday, December 15, 2012

FINAL PROJECT

After a semesters worth of work leading up to the majority of the space for the second floor of a hotel in Washington State the final outcome has been completed! It's been a long journey of learning and experimenting. Many changes and challenges in personal and professional life have taken place during this semester but I am proud to say that I am satisfied with the outcome of this project.
A total of 4 boards were used to demonstrate the final pieces of the project to give the full spectrum of the project for the common space and two bedroom and one bedroom design.

As designers at Washington State University we were asked to come up with a design for a client that meet his idea for the project. Basically what he wanted was for the space to feel like home. He didn't give us so much as specific ideas as possible but more of the freedom to explore our creativity and ideas without having to worry to much about restrictions.

We were asked to find a poem, short story, or song that reminded us of what the meaning of home truly was. Since we were given the location of the project - all I will devuldge is that the location is somewhere on the Palouse - with that being said I applied what home meant to the people on the Palouse. That way if the client decided to go along with hotels or apartments then he could give visitors a taste of what the Palouse is all about.  The song I chose is called "Amarillo Sky" by Jason Aldean. Its my personal knowledge first hand that the people of the Palouse are hard working folks and have long days almost everyday of their lives. I wanted to create a space using the color palette of the hay fields at 5 am in the morning when the sunlight hits the grains for the first time with the dew still in the air. Many times I have personally gone out in the hay fields and baled hay from dusk to dawn. The color palette is the earth tones the client prefers as well as the colors that come to mind when thinking about the Palouse.

Lyrics:
He gets up before the dawn
Packs a lunch and a thermos full of coffee
It's another day in the dusty haze
Those burnin' rays are wearing down his body
And diesel's worth the price of gold
And it's the cheapest grain he's ever sold
But he's still holding on

CHORUS
He just takes the tractor another round
And pulls the plow across the ground
And sends up another prayer
He says Lord I never complain I never ask why
But please don't let my dream run dry
Underneath, Underneath this
Amarillo sky

That hail storm back in '83
Sure did take a toll on his family
But he stayed strong and carried on
Just like his dad and grandad did before him
On his knees every night he prays
Please let my crops and children grow
Cause that's all he's ever known

CHORUS

And he takes the tractor another round
Another round, another round
And he takes the tractor another round
Another round
He says I never complain I never ask why
But please don't let my dreams run dry
Underneath, underneath this
Amarillo Sky

Underneath this
Amarillo sky


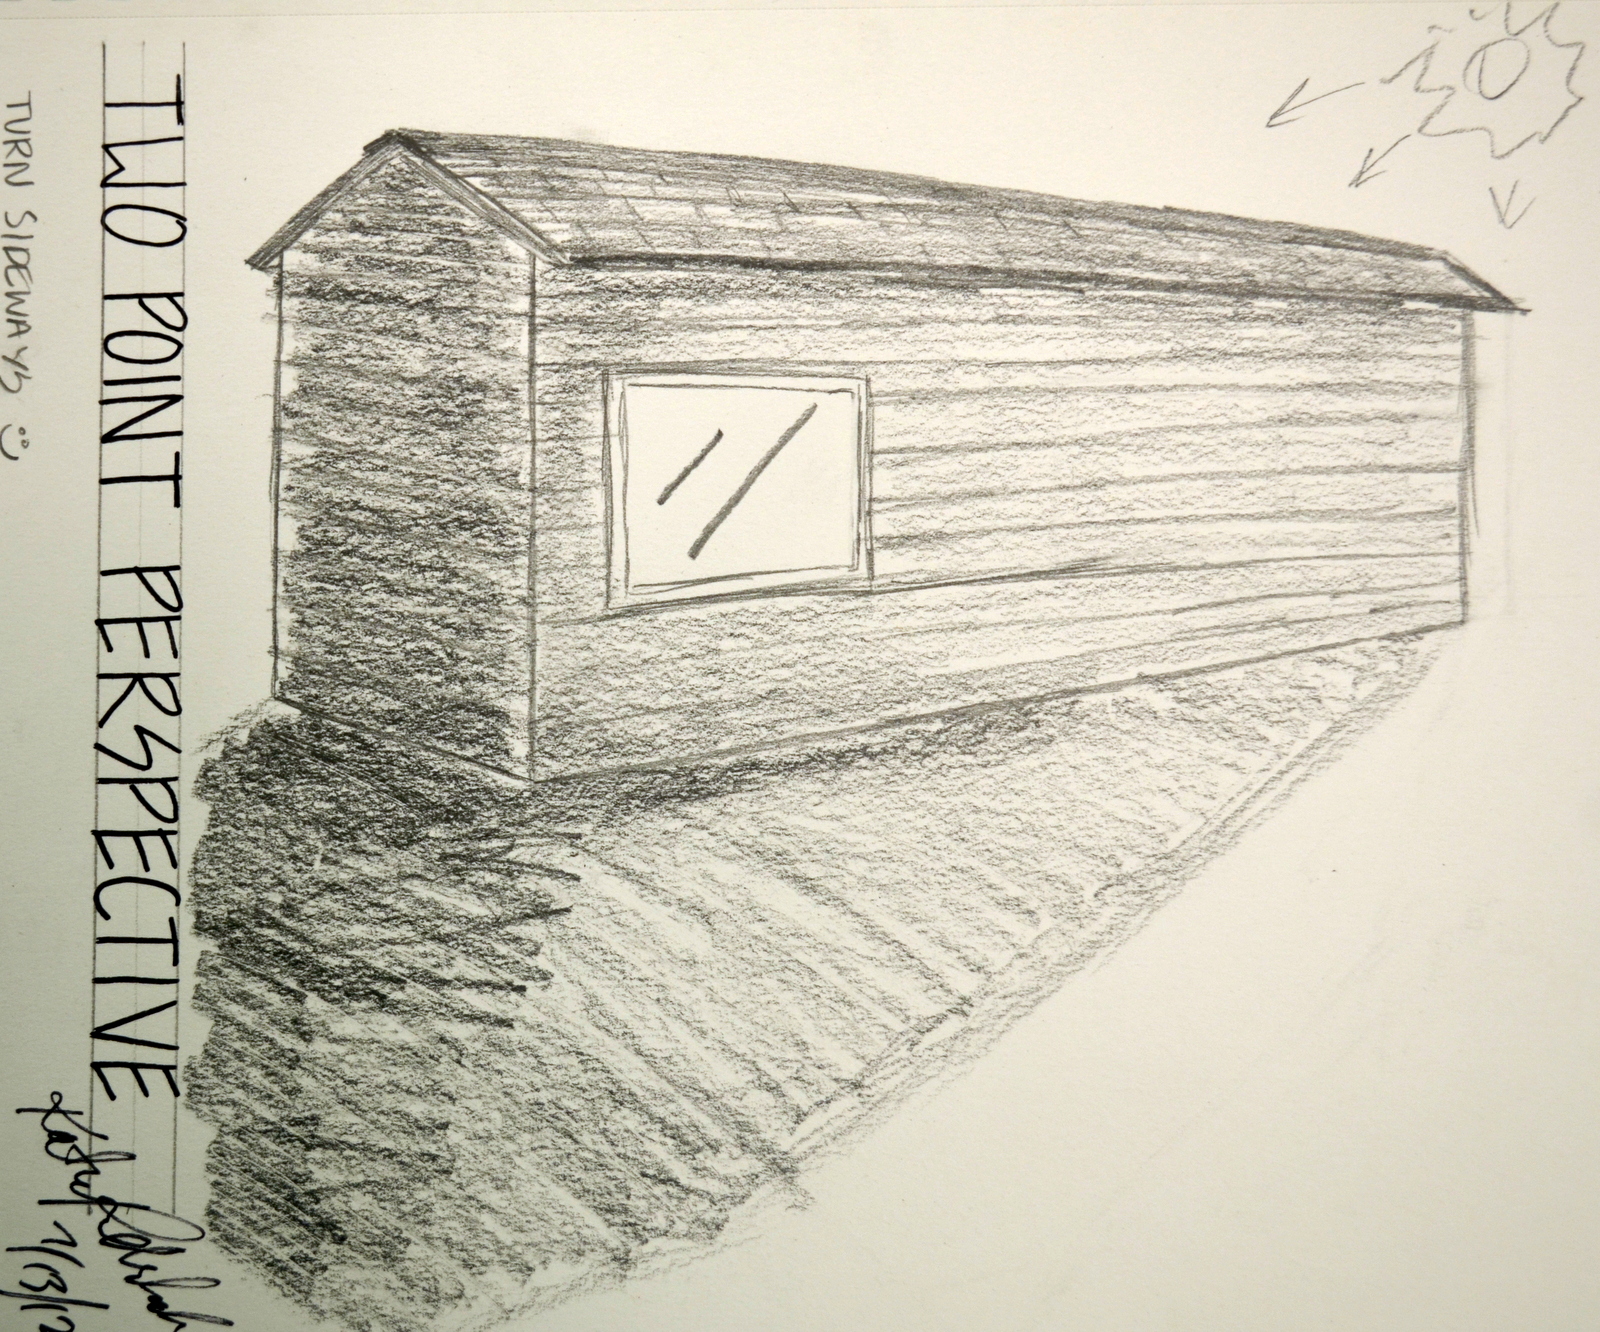
The first board in the series of presentation boards is the process board. It shows how I came up with the idea and my growth through out the design process to get the information and plans for the next posters. 
Most of the walls I created for the interior space are custom storage and  display cases. The elevations and section a well as the floor plan show all of the details of the space I created. I chose where to put the walls and the colors and materials for them. The materials board and perspective board show the colors and give the idea of the space created. The bathroom is ADA accessible and the entire apartment is set with 5 foot turnarounds in the major spaces for easy access. 


This is a 3d model of the one bedroom apartment that I created complete with volumetric details that are built in to the apartment. It also demonstrates possible furniture arrangements the client or occupants could use in the space. 


Above are four perspectives, two one point perspectives at 12" x 12" and two two point perspectives at 6"x 6."
The entry way view show the custom built wall and storage space where knick knacks can be stored and displayed. The common area view shows the custom sofa I built so that people can either sit on the inside or the outside of the sofa and remain comfortable on the red leather. The bottom left view of the living room is my favorite view because it shows an existing window and the custom built open display case which allows a view into the kitchen as well as displays prized possessions. The storage closet view shows the bathroom door to the right and shows the view looking straight ahead into the storage closet which is the main storage closet for the apartment. 

This is the materials board where the materials for each room are divided up by the individual room and for the entire apartment materials. It has a earth tone palette with accenting pops of red. 

Wednesday, December 12, 2012

Bathroom Project


For the bathroom project I designed the bathroom for the two bedroom space in the hotel project we are currently working on. The same inspiration of the meaning of home applies to this design as understood through the song Amarillo Sky by Jason Aldean. I used very small tiles for most of the design so it was a bit challenging to come up with the drafted versions of the bathroom, however I pulled through and I love what I  came up with in the end. Above shows a floor plan measuring in inches as I learned that cabinetry is measured in inches and so are bathroom designs. The sink area and storage cabinets work together to create one piece of furniture. The woods matched and compliment the other piece very well. The sliding barn door for the main entrance of the bathroom is unique within it self but will suction cup close to keep smells in. The ventilation system in the bathroom should do a good job of eliminating smells and moisture though.
The majority of the materials used were from daltile and pentel. The glass door to the master bedroom keeps  it private from guests while allowing light to come through the opening.

Wednesday, November 28, 2012

Interview on Project


Over Thanksgiving break I interviewed a residential designer - Will Thomas, CBD. He is WSABD certified building designer. He has 36 years of hands on construction, design and drafting experience and specializes in older homes and older home styles of character and charm with integrated Green technology and energy efficient features.

I chose to interview Will Thomas due to the fact that he is working on my parents home remodel. So far the blueprints look fabulous and I can't wait to see the results!

Will and I planned to meet at a Red Robin which we did to talk about the current project I am working on - a commercial / residential space on the second floor of a building. One part of the floor is going to be a spa and the other rooms are divided up into a laundry space, common area, and apartments. The space our class is working on is the common area and a one bedroom and a two bedroom apartment.

My theme/ focus for the project is all about the word and meaning of the word home. For that I chose the song Amarillo Sky and my color palette is inspired by the vibrant reds and greens of the hay in the hay fields as well as the neutrals of the hay.

This is what Will and I talked about as well as sq footage and requirements and laws as well as some new possibilities for my floor plan.

I will continue to improve upon my floor plan and keep working hard to present the best work possible.


Monday, October 8, 2012

Urban Sketchers

During our time at Sculpture park in Seattle, Washington we had the chance to sketch with the Urban Sketchers of Seattle. We practiced and relearned sketching exactly what you see and using your pen/penicl to measure and mark on your paper the points needed in order to create a great sketch.

I consider the below sketches to be successful due to the detail and accuracy of them.

I realized my weakness is in my patience and once I do something wrong I also have the need to erase or start over instead of continuing through with the drawing.

My strength is in my technique and strokes with my shaky hands.


See below examples

Job Shadow - Starbucks

Since my job shadow did not want us taking pictures during the day as we were shown secret trades of Starbucks I will not be including pictures /sketches in this post to protect their rights as a company. Much respect for Starbucks. After getting off at the wrong stop at the light rail the day was off to a rocky start. But our guide was very understanding and gave of the gist of what we had missed and sent us straight to a tea tasting of a new tea that will be coming out in November and trust me it is to die for, but I degress.
We learned that knowing / learning how to do sketches, and bascially everything by hand is quite a useful skill to have and that we need to keep up the good work.  Knowing computer programs such as sketch up, revit, CAD ,etc is mainly what we will need to be proficient in in order to work well as a design.
We learned alot about the history of Starbucks and went out to the lunch with our guides as well.
Those were mainly the skills we focused on as well as the information they were trying to get across in order to help us in becoming designers.

Kitchen Project

For the kitchen project I used my inspiration from my concept development post to inspire this floor plan, the materials and the overall feel to my space.


 One of my favorite things about this project is the fact that I incorporated my concept model/parti into not only the flow between the rooms in a motion pattern but with this handle that I found for my cabinetry.
From this project I learned that I need to seek out help when I need it and keep up the good work. Also if things go missing I need to report it right away. I also Need to remember to add in all of my lighting plans and cross check everything with one another so that it all makes sense.
The bathroom project will be much better.

Showrooms

Our trip to Seattle was well worth the journey. We got to bond with one another while staying at the Roosevelt Hotel and while going to different appointments with different companies and firms. We dressed in professional attire and constantly inquired about the companies and manufactured products, etc. Our group started out by departing from Pullman Washington- small country town and headed out towards the big city of Seattle, Washington. Its about a six hour drive without complications... well with a bus full of 41 giggly girls and 4 men things didn't go according to plan. The bus broke down about 6 feet from the top of the pass - over heated engine. While we worked on fixing the engine our friends in the landscape classes passed us in their caravans. Eventually we got up and moving and stopped for lunch in Issaquah where we switched buses and tried to stay on schedule. 
Arriving in the Seattle Design Showroom district we took a tour of SDC (see group photo below). We were allowed to see some materials rooms and were told we would be getting some free samples. Who doesn't love free samples of fabric!? We also received free wrapping paper samples. These will be used for Christmas this year. It was great to get to touch and see all of the materials, furniture and everything they had to showcase. I really enjoyed the furniture rooms where they had treated their wood pieces in a different way then other stores. They did a number of finishes, treatments, etc to get the wood just perfect. I would describe it as looking into the wood rather then looking at it. 
Next we walked to the Daltile showroom where we experienced a lot of tile work. We registered for a lot of free samples which are being shipped to us. This will aid in helping us with our kitchen and bathroom projects that we are currently working on. Right now I am focusing on sustainable materials but I have room for some different materials from Daltile. The samples from Daltile are beautiful and I can't wait to see them again. After Daltile we visited Pental where we got to explore another showroom which was just as exciting as Daltile. Pentel had some wonderful bathroom/ room setups that we could see the materials physically being used in. It was truly an outstanding visual- to be able to see the sample splotch on an actual surface made visually other samples on surfaces easier. 
-END OF DAY ONE-

-DAY 2-

On day two our two groups went our separate ways again -Group B (my group) walked to the Knoll showroom on 5th avenue. We were given a grand tour of the showroom and got to see all the chairs. Some of the classics were there such as the Womb chair, Wassily chair, Bird chair, Tulip chair, Diamond chair, etc. We were able to see their office space designs and new innovative designs for compact office cubicles as well as their transforming office chairs. The transforming office chairs conform to the person basically. If you are a 6'5" man you can accommodate yourself  in the chair by simple raising the chair and pulling the seat out farther and pulling the arm rests out. The backing is made of a breathable material that is strong and durable. I strongly believe that Washington States School of Design and Construction should invest in these classic chairs. We then sketched chairs for the remainder of our time there. Next we caught a bus ride to 3 Form. 
3 Form is one of my favorite materials- ever since I was introduced to it during summer session I have used it in all of my projects. 3 Form is made of an eco-resin which makes it easy to clean off of, bend, use as lighting, and easy to create almost anything out of it. The 3 Form showroom we visited dealt primarily with lighting but they did say that they could make anything imaginable. 


Concept Development

Concept Development

For my concept development I started doing 2d abstractions [parti's] which evolved into a final parti and from there I created concept models and space study models.

On the above parti's I focused on the use of color. I used the song Amarillo Sky for inspiration for my project that will continue to be my inspiration for the kitchen, bathroom, living rooms, etc. for the one bed room two bedroom and common space.


The partis in the second sheet that I made were done in black white to focus on the elements used to design them rather then emphasize them with the use of color. the final parti i chose is done in red to show the warmth of family and is an abstraction inspired by the infinity sign. Family is forever.

 The next four photos show the concept model I developed from the final parti (above). I left it in white due to the fact that I wanted to keep it open minded so people could intrepret it however they pleased.


I used the flowly element that the client wanted and focused on openness while still relating it to my concept model through the use of flow and connectivness. These are two different floor plans that I came up with. I hope to find a better fitting floor plan after I do the wheelchair exercise. It could change my whole design potentially.


Ride Don't Walk


I participated in ride don’t walk as participant number one. First I got into the elevator in Carpenter and went to the second floor bathroom. This normally simple task turned into a huge effort to open the door and squeeze the wheel chair past. Once inside the bathroom I was unable to enter the handicap stall with the bigger wheelchair due to the corner right in front of the bathroom door. I proceed to the sink where I had to stretch very far in order to get to the sink and then came the awkward wrist angle of pumping the soap. This bathroom may have said it was handicap accessible but it clearly was not made for everyone. Honestly if I had been badly injured and was in a wheelchair I would have had peed my pants due to the simple fact that I would not be able to get into a bathroom stall let alone sit on the toilet.
I felt that this assignment was very well thought out and very beneficial to all that participated. It truly got me to think about how things were angled and oriented in the room so that anyone could use it and access it. The fact that we had to do this assignment during our kitchen project and upcoming bathroom project really made me feel like I had to go back through my layouts and change things around. I rethought the majority of my designs and am planning on redoing my layouts continued by perspectives to scale to really allow myself to walk through the space I’m creating.  
The small spaces are great for saving money and using every inch possible of the space we pay for especially in a hard economy. Using sustainable materials, transforming old buildings… whatever it is we need to make sure it is accessible to all kinds of people no matter the height, limitations, and x-variables which ever it may be it needs to be inclusive.
I struggled with the fact that I had to control myself as I rolled downhill out of control and work hard to get up a hill. I’ve been in wheelchairs before but it was usually post-surgery and other people took care of me. It took me twice as long to get to the same place as everyone else who was not in a wheelchair. I struggled to get through doorways, opening and closing doors, cub boards, etc. Picking things up and carrying things were difficult and took me awhile to get used to.  Everything felt as if it was inaccessible and the things people normally take for granted were seemingly impossible.
Knowing that everyone else could do the things I struggled with pushed me to continue as always but it still would have been nice if the things that are claimed to be handicap accessible were actually just that- accessible.


Wednesday, September 12, 2012

Context Poster

The context poster design was designed around the topic - color in interiors. For our template we used a grid like pattern for our background as well as for the arrangement of information presented on the poster. For this poster I used rooms from designer; Meg Braff, in the Ritz Tower, New York. Although her designs are ornate I'm focusing on the main colors of each individual room. 'Every hue in the color spectrum brings an emotional reaction to the individual viewing it. There are universal moods defined by the general population[in this case- Western culture] for each and every hue depending on the intensity of the hue's value and intensity. Emotional response of colors in interiors overlaps with the psychological effects of colors.  

Friday, July 27, 2012

Seat and Shelter


For my presentation of my model I showed my inspirational quotes, designer; Frank Lloyd Wright, and object analysis, parti's, concept models, floor plans, section, north and east sides, materials perspective views and shadow from 3 times during the day. The name of my final seat and shelter is called Rigid Flows due to the inspirational rigid lines of Frank Lloyd Wright's many designs, found objects; pine needle and the flows of the second inspiring object; water.  These posters are mainly to show my process through the entire design up until the final model and presentation boards.

I designed the seat and shelter prototype for outside the EMP in Seattle, Washington. The warm colors of the EMP structures and grays of the city will contrast with the popping blue,purple, and green tones of Rigid Flows. Rigid Flows incorporates both art and shelter/seating purposes in its structure. Granite and quartz are used to incorporate nature into the design. Using these rocks as seats are designed to keep the people of Seattle comfortable. I am from the Seattle area so I've experienced the Seattle culture and the native people in Seattle are very relaxed and down to earth in the city. You can meet some very interesting people in Seattle. For the most part they are even comfortable just sitting on the rocks against the shoreline, the curb of street and anything in between. The rocks are designed to me smooth and comfortable to sit on with some curvature to encompass any human size.
Also the inside of the structure is made for a handicap-able person to back up into and stay out the rain which Seattle is known for.

I chose to have a metal roof for my seat and shelter so that the sound of the rain hitting the roof would create a beat much to that as music. Seattle is well known for its music created my street musicians and talented musicians from the schools. Basically the seat and shelter will fit right into the day and night life of the cityscape and be in harmony with the city itself as a whole.

Friday, July 20, 2012

Final Model


This is the final model of my seat and shelter; RIGID FLOWS. It was inspired by Frank Lloyd Wright as well as natural objects such as pine needles and water. This particular photo was taken at noon in order to see the shade casting (more photos from different times to come soon). My seat and shelter is made primarily out of metal with up lighting in the ground and inhabits iridescent aspects in the design. The rigid lines and smooth surfaces are reminiscent of Frank Lloyd Wright designs. Also reminiscent of his designs are the organic aspects; the rocks and forms of the piece inspired by pine needles and water.

Sunday, July 15, 2012

Revised & Final Concept Model

 It's finally here! The final concept model! The first photo shows the front angle and the other photos are all different angles. It was fun to build all these models but I finally settled on this one as my final concept model. The next model(s) to come is seat and shade model. It took awhile to get to this point and settle on a design but I believe this was the best model I came up with that is reminiscent of Frank Lloyd Wright designs and inspired by. Enjoy! More to come! This was a great experience to make models out of plastic and metal. Being able to be in control and manipulate all the curves and twists was a thrill you can't replace as a designer.


2pt Perspective

To practice two point perspectives I found this old house that was about to be torn down in Viola Idaho. I drew this using graphite pencils of different line weights. Being able to practice the two point perspective was fun but it proved to be difficult. The angles and I just didn't seem to agree 100 % of the time. I guess I just need more practice.

Virtual Room Creation

First I drafted out the grid on paper for the room, then I added a layer of structural elements, furniture boxes, refined furniture & people, and then a final drafted drawing of everything all together. 
The next step I took was to scan in my final drawing into the computer and input digital materials for the textures and colors to create the look I wanted. I love the way it turned out and I am very pleased with the outcome. This was the first time I had done a hybrid drawing like this so it was great experience. If I had to do this all over then I would add beams to the ceiling and make a better hallway. Its a fun little self project you can do to keep practicing your skills as a design.

In the Corner

This was a sketch I did to practice my ability to use my pencil to help draft out a room. This one came out a lot better then the red building [one point perspective] that I did. I also practiced using shades and shadow in this one measuring everything to scale how I saw it. I chose to the brick walls and the windows in order to challenge myself to get all the lines correct. The windows are all blocked out so there was no natural light source coming into the room through that window. The carpet is very finely woven so all I really did was texture it through graphite.

3 best study models


Each of these were inspired by my 3 parti's and are my three favorite study models. I will use these for inspiration of my concept model and then again for my seat and shelter. Being able to create these concept models using different materials to work with was fun and helped me gain experience in model building. I had never worked with chip board or cereal boxes or metal before in my model building. I've only ever used form core, wire, foam blocks, lighting strands, etc. 
So basically this was a good step to take in my designing since I gained a lot of experience. 
The first study model was made out of a combination of chip board and cereal boxes and inspired by parti #3. The second model was made using chip board, cereal boxes, and metal - inspired by parti #2. The third model was inspired by parti #1 and is made of metal and plastic. 

Exterior 1pt

This exterior sketch done in colored pencil and black ink flair pen uses one point perspective. It was hard for me to do since I was not allowed to go closer (closed off for construction). I did this sketch to practice my ability to do one point perspectives. I definitely have room for improvement. I just have to keep on practicing. I used my pencil to take measurements - which is a useful skill to have in drawing. I haven't been using it for a long time only about 5 years off and on so I definitely need to keep practicing with it.

Frank Lloyd Wright Reminiscence


 The above picture was taken around three o'clock pm in high sunlight. The pine needles are the inspiration for a seat and shelter I have been designing that is reminiscent of Frank Lloyd Wright. Refer to the Frank Lloyd Wright poster posted a few weeks ago. I used quotes from Frank to inspire the seat and shelter (concept models to come soon for your viewing pleasure).


 After gathering/picking pine needles off the tree I did a complete object analysis of the needles. Being able to give the object my undivided attention to study it allowed me to come up with a bunch of concept sketches and eventually 3 parti's (see below).


At this stage I was able to incorporate water into my designs and narrow down my 100's of idea sketches into 3 final parti's. These three parti's will be used for the inspiration of my study models and from there I will chose 3 of my best and use them to inspire my concept model. 

Two Rooms

For this sketch I wanted to show the difference between the use of just lines and then the use of lines with shade and shadows. The first sketch on the left shows just lines while the one of the right shows the use of lines with shade and shadows. The first drawing was done using a black flair pen while the second drawing was done using black flair pen. I struggled to do this freehand with no rulers because I have shaky hands due to surgeries but I still think these turned out well. I emphasized the negative space in the first sketch and in the second sketch I emphasized shading and shadows.

The Fabulous Chair

This complete series of my chair in the dining hall at University of Idaho was to help me gain personal experience with different view points of this fabulous chair. I took the chair and did a perspective drawing, side, front, underneath, above, and pattern view of this chair. I practiced my measuring skills and rounding to a half inch. Being able to draw and sketch is a skill I feel designers should constantly be keeping up on hence all these sketches. I was also able to practice my measuring skills, which as a designer you constantly need to be on your toes about.

Napkin Art

"Napkin Sketch"

Since I ran out of paper I decided to draft out a floor plan and a perspective drawing of my new dorm room for everyone to see. It's freehand drawn to scale or close to it in a black ink flair pen. My dorm is located in McEachern Hall North on the Washington State University campus. By doing these drawings on a napkin I came across some obstacles, such as ink bleeding thus distorting the image I was trying to create. Writing on napkin material proved to be very difficult. This napkin was more of a paper towel type texture with lots of bumps and absorbancy. I tried several brands of napkins ranging from cloth to paper napkins. There are so many paper napkins out there in the world but I finally settled on the paper towel type napkin since it proved to bleed less than the ones I previously tried. Now that I have gotten the experience of napkin drawing under my belt my lines on flat paper have become steadier and more streamline.

Tuesday, July 3, 2012

Greek Pattern


I made a patter of 10 inches by 10 inches using manipulated Greek pictures representing the 5th Century BC. I chose to do a grid pattern of 2 by 2's and to change the directions of the photos to create a central point while making it asymmetrically balanced[few things that aren't actually symmetrical]. The color harmony palette I chose was triadic; its captivating and attention grasping. The below image chose the original images I cut out of different pictures and how I transformed and manipulated the images in Photoshop to create my color harmony.  

Monday, July 2, 2012

Frank Lloyd Wright Bio

One of my favorite interior designers / architect is Frank Lloyd Wright. Personally if I had to describe Frank's style of design I would say 'organic geometric.' The rigidness of his designs and his incorporation of shapes is what he is well known for. Using the elements and principles of design that I correctly identified in my Elements and Principles Posters [earlier post]  I was able to create a well thought out poster for Frank Lloyd Wright. I used an underlying grid to create the overall layout with varying protrusions; similar to his style of work. For example the text boxes start and end at different points on the page just like the lines in the stained glass art by Frank [left side]. It is also similar to the way the Falling Water house is built [see background]. The color scheme may be slightly dull in appearance which is something for improvement but other then that I believe it is spatially pleasing and informative.

Elements and Principles


Using the elements and principles of design I constructed two posters that represent each element and principle per Greek 5th Century. I searched through numerous books and websites in order to find all of these images and placed them accordingly onto the posters. Each element and principle is clearly defined with a supporting sentence and description of the image to go along with it.
If I had to change anything about my design it would be to use more color and really make the poster pop. I used an underlying grid to create order in the posters. One of the posters is done vertically while the other is done horizontally - the pieces fit better for each of the layouts in these forms.